
Two things break when you drop LED bulbs into a GM halogen housing. The body control module sees the lower current draw and throws a lamp-outage warning, and the pulse-width-modulated daytime running light circuit makes the bulbs flicker or strobe. Both are fixed with decoders or anti-flicker harnesses. The third problem, beam pattern, is not fixable with a module.
That is the honest version of the LED upgrade. If you plan for all three before you order, it is a one-evening job with a good result. If you buy bulbs alone and hope, you end up with a dash warning, a flickering DRL, and a beam that scatters light into oncoming traffic. Start with LED bulbs, decoders and lighting accessories for your GM truck or SUV and buy the supporting parts in the same order.
Parts and tools you'll need
- LED bulbs in the correct size for your headlight housing — from aftermarket lighting accessories
- CANbus decoders or anti-flicker capacitor harnesses, one per headlight circuit
- Load resistors if you are also converting turn signals — see GM electrical and ignition parts
- Zip ties, dielectric grease, and a piece of flat wall for aiming the beam afterward
LED bulbs
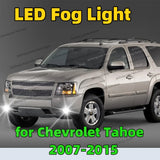 2X LED Car Fog Light Auto Lamp Bulbs 6000K Plug and Play
$17.65LED bulbs — confirm size and CANbus compatibility. Confirm fitment by VIN before ordering.
2X LED Car Fog Light Auto Lamp Bulbs 6000K Plug and Play
$17.65LED bulbs — confirm size and CANbus compatibility. Confirm fitment by VIN before ordering.
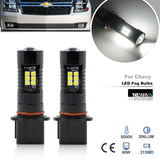 Fits For 2015 2016 2017 2018 2019 2020 Chevrolet Tahoe
$29.79LED bulbs — confirm size and CANbus compatibility. Confirm fitment by VIN before ordering.
Fits For 2015 2016 2017 2018 2019 2020 Chevrolet Tahoe
$29.79LED bulbs — confirm size and CANbus compatibility. Confirm fitment by VIN before ordering.
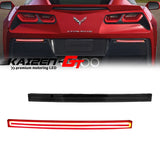 Smoked / Red Lens Red LED Car Rear Bumper Reflector Lights
$61.94LED bulbs — confirm size and CANbus compatibility. Confirm fitment by VIN before ordering.
Smoked / Red Lens Red LED Car Rear Bumper Reflector Lights
$61.94LED bulbs — confirm size and CANbus compatibility. Confirm fitment by VIN before ordering.
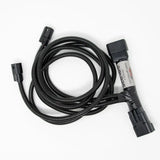 14-18 Sierra LED Fog Light Adapter Harness
$128.99LED bulbs — confirm size and CANbus compatibility. Confirm fitment by VIN before ordering.
14-18 Sierra LED Fog Light Adapter Harness
$128.99LED bulbs — confirm size and CANbus compatibility. Confirm fitment by VIN before ordering.
Why does my GM throw a headlight warning after installing LEDs?
Because the body control module measures current on the lamp circuit to detect a burned-out bulb. A halogen low beam draws roughly 55 watts. An LED replacement drawing a fraction of that looks identical to a dead filament from the module's point of view, so it reports an outage.
This is what people mean by CANbus error, though the term is loose. The CAN bus is just the network the message travels on. The actual detection happens in the module driving the lamp, and GM has used variations of this monitoring for many years across trucks, SUVs and cars.
The fix is a decoder: a resistor pack or an active load module wired in parallel with the bulb that presents the circuit with something closer to a halogen's draw. It sits between the vehicle harness and the bulb, and on most GM applications it is plug-and-play with no cutting.
What a decoder does not do is make the bulb brighter, change the beam, or fix a wiring fault. If you had a headlight message before the LED install, the decoder will hide a real problem rather than solve it. Read the codes first.
Why do LED headlights flicker on a GM truck?
Because GM runs the daytime running light function by pulse-width modulating the headlight circuit — switching power on and off rapidly to dim the lamp. A halogen filament has enough thermal mass to glow steadily through that. An LED driver responds instantly, so you see the switching as flicker or strobe.
You will usually notice it only in DRL mode. Turn the headlights fully on and the flicker disappears, because the circuit is now getting continuous power. That symptom pattern is the fastest way to confirm PWM is the cause rather than a loose connector or a failing bulb driver.
The fix is a capacitor-based anti-flicker harness that smooths the pulsed supply into something the LED driver can work with. Some bulbs advertise built-in PWM handling and genuinely have it; many do not, and the ones that do not are the ones generating the forum threads. Buy the harness with the bulbs rather than after.
| Symptom | Most likely cause | What actually fixes it |
|---|---|---|
| Dash message about a headlamp being out | BCM lamp-outage detection reading low current | CANbus decoder / load module on the affected circuit |
| Bulbs strobe in daytime running light mode only | PWM dimming of the DRL circuit | Anti-flicker capacitor harness |
| Bulbs flicker at all times, both beams | Poor ground, corroded connector, or low system voltage | Clean and secure grounds first — do not add a module to a bad ground |
| Turn signals blink twice as fast | Reduced load on a signal circuit that monitors it | Load resistors per corner, or bulbs with the resistance built in |
| One side works, one side does not | Bulb orientation or a bulb driver that did not seat | Reseat, check the connector, and confirm the bulb clocking |
| Radio static or interference when lights are on | Electromagnetic interference from a cheap LED driver | Bulbs with proper EMC shielding — this one is a product problem |
What causes hyperflash and how do I stop it?
Hyperflash is the signal circuit telling you it thinks a bulb is out. Replace an incandescent turn signal with an LED and the load drops so far that the vehicle's outage detection triggers, doubling the flash rate. Load resistors restore the missing electrical load and the rate returns to normal.
Resistors are the crude fix, and they work. The tradeoff is heat: they convert the excess energy to warmth, and they get genuinely hot in use. Mount them to bare metal, away from wiring looms, plastic, and anything in the airflow path of a headlight housing. Do not zip-tie a load resistor to a harness and tuck it behind a bumper cover.
The cleaner alternative is a bulb designed with the correct load built in, sold as CANbus-ready or error-free for the application. Fewer parts, less heat, more money. On a truck you plan to keep, it is the better buy.
Our writeup on GM lighting upgrades including DRL boards and brake light conversions covers the same electrical logic applied to the rest of the vehicle.
CANbus parts
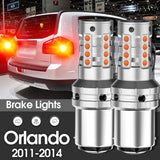 Canbus LED Brake Light Lamp 2pcs Accessories For Chevrolet
$43.88CANbus decoders and LED adapters. Confirm fitment by VIN before ordering.
Canbus LED Brake Light Lamp 2pcs Accessories For Chevrolet
$43.88CANbus decoders and LED adapters. Confirm fitment by VIN before ordering.
 Car Interior LED Light For GMC Acadia Canyon Envoy Jimmy
$13.28CANbus decoders and LED adapters. Confirm fitment by VIN before ordering.
Car Interior LED Light For GMC Acadia Canyon Envoy Jimmy
$13.28CANbus decoders and LED adapters. Confirm fitment by VIN before ordering.
 For GMC Terrain 2010-2023 Acadia 2017-2019 Chevy Equinox
$31.86CANbus decoders and LED adapters. Confirm fitment by VIN before ordering.
For GMC Terrain 2010-2023 Acadia 2017-2019 Chevy Equinox
$31.86CANbus decoders and LED adapters. Confirm fitment by VIN before ordering.
 2pcs For Chevrolet Captiva 2006-2018 LED Brake Light 2007
$15.62CANbus decoders and LED adapters. Confirm fitment by VIN before ordering.
2pcs For Chevrolet Captiva 2006-2018 LED Brake Light 2007
$15.62CANbus decoders and LED adapters. Confirm fitment by VIN before ordering.


Will LED bulbs give a good beam pattern in my GM headlights?
Sometimes, and it depends almost entirely on the housing. A halogen headlight is an optical system designed around a glowing filament in a precise location. Replace that filament with LED chips arranged on flat planes and the optics no longer see the light source they were engineered for.
Projector housings are more forgiving because the lens and cutoff shield do most of the shaping. Reflector housings are less forgiving, because the reflector itself is the optic and it is tuned to a specific emitter geometry. A poor result in a reflector housing shows up as light thrown above the cutoff, a washed-out hot spot, and a beam that looks bright to you and blinding to everyone else.
| Factory headlight type | How to identify it | Realistic LED bulb outcome |
|---|---|---|
| Halogen reflector | Chrome or silver bowl visible behind a clear lens, bulb sits in the bowl | Most likely to produce glare and a poor cutoff. Highest-risk swap. |
| Halogen projector | Round lens element with a visible bowl-shaped internal shield | Best chance of a usable pattern, if the bulb's emitter position matches the filament position |
| Factory HID projector | Projector lens, plus a ballast and igniter behind the housing | Do not swap a bulb into it. Different socket, different driver, different problem. |
| Factory LED assembly | No serviceable bulb, sealed unit with an integrated driver | Nothing to convert. Replacing the assembly is the only path. |
Bulb size is the one number people get wrong most often, and it is not consistent across a single model year on GM trucks — different trims got different housings, and mid-generation refreshes changed sockets. Do not order by model name. Pull the bulb out of your own truck and read the code molded into the base, or check it against our GM bulb size chart for headlight, fog and tail lamps.
Are LED conversion bulbs street legal?
Not in the strict federal sense. Under FMVSS 108, a headlight assembly is certified as a system with a specific light source. An LED bulb installed in a housing certified for a halogen filament falls outside that certification, and NHTSA does not approve individual equipment items at all — manufacturers self-certify.
The DOT marking printed on a bulb package is a manufacturer's compliance claim, not a government approval. Enforcement varies enormously by state and by inspection regime, and in practice most drivers never hear about it. That is a description of enforcement, not a legal opinion, and it does not change what the standard says.
The practical position: if you want the light output without the ambiguity, buy a complete replacement headlight assembly built and certified as an LED unit rather than converting a halogen housing. If you convert anyway, aim the beam properly afterward. A conversion that is correctly aimed and produces a clean cutoff is a far smaller problem for other drivers than one that is not.
How do you install and aim an LED conversion?
The install itself is straightforward on most GM trucks and SUVs: access the back of the housing, twist out the old bulb, plug in the new one, and route the decoder. Aiming is the step people skip, and it is what separates a good conversion from a bad one.
- Disconnect the battery negative terminal before working behind the headlights.
- Remove whatever restricts access — on many trucks that is the air box, a fender liner section, or the grille.
- Twist out the old bulb and unplug it. Handle new bulbs by the base, never the emitter.
- Plug the LED bulb into the vehicle connector, then plug the decoder or anti-flicker harness inline as the instructions specify.
- Clock the bulb so the emitters face the correct direction — usually flat sides at three and nine o'clock. Many bulbs have an adjustable collar for this.
- Secure the driver module and any decoder away from heat sources and moving parts, and away from where water collects.
- Reconnect the battery, turn on the lights, and confirm no dash messages and no flicker in DRL mode.
- Park square to a flat wall about 25 feet away on level ground and check the cutoff line against the wall.
- Adjust the headlight aim screws until the cutoff sits below the height of the headlight center and is level side to side.
- Drive a dark road and check what the beam does at distance before you call it done.
Safety note: a headlight aimed even slightly high puts glare into oncoming windshields at exactly the distance that matters. Aiming takes ten minutes and it is the difference between an upgrade and a hazard.
If a warning message persists after the install, read the stored codes rather than assuming the decoder failed. Modules on these vehicles will keep reporting a stale fault until it is cleared.
Which GM vehicles need decoders and which do not?
There is no clean list, and anyone who gives you one is guessing. Lamp-outage monitoring and DRL strategy vary by model, model year, and even trim level within a year, because different lighting packages use different modules.
What is reliable is the pattern. Newer vehicles are more likely to monitor and more likely to complain. Trucks and SUVs with factory LED daytime running lights often have more aggressive circuit supervision than base trims with plain halogen lamps. Older vehicles with simple relay-driven headlights frequently need nothing at all.
The practical approach is to buy the decoders with the bulbs and not install them unless you need them. They cost little relative to a second shipping wait, and finding out you need one after the bumper cover is back on is the annoying outcome. If your truck runs clean without them, you have spare parts. If it does not, you finish the job the same evening.
What about fog lights and the rest of the vehicle?
Fog lights are the lowest-risk LED conversion on the vehicle. They are a wide, low, short-range beam, the optics are less demanding, and the legal position around auxiliary lamps is different from headlamps. If you want more usable light for very little trouble, start here.
Interior and marker lamps are easy too, though the same outage-detection logic applies to some exterior positions. License plate lamps and cargo lamps rarely cause trouble. Turn signals and brake lights are where you will meet hyperflash, and reverse lamps are where an LED upgrade makes the biggest real-world difference at night.
For the wiring side of any of this — connectors, sockets, pigtails and relays — work from GM electrical and ignition parts rather than generic hardware. Automotive connectors are sealed for a reason.
What to check before you order
- Pull a bulb and read the size code off the base. Do not order by model year alone.
- Identify your housing type — reflector, projector, factory HID, or sealed LED. It determines whether a bulb swap is even worth doing.
- Buy decoders or anti-flicker harnesses with the bulbs, one per circuit you are converting.
- If you are converting turn signals, budget for load resistors or bulbs with built-in load.
- Check that the bulb has a physical fit path — some LED bulbs need dust cap clearance your housing does not have.
- Plan to aim the beam the same day. A wall and a tape measure is all it takes.
Headlight assemblies and harnesses
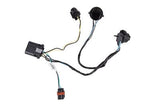 ACDelco Headlight Wiring Harness, GM OE
$97.99Headlight harnesses and assemblies. Confirm fitment by VIN before ordering.
ACDelco Headlight Wiring Harness, GM OE
$97.99Headlight harnesses and assemblies. Confirm fitment by VIN before ordering.
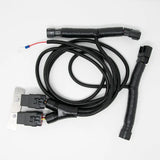 14-15 Sierra SLT/Denali to '16-'18 GMC Sierra 1/2 Ton HID
$318.99Headlight harnesses and assemblies. Confirm fitment by VIN before ordering.
14-15 Sierra SLT/Denali to '16-'18 GMC Sierra 1/2 Ton HID
$318.99Headlight harnesses and assemblies. Confirm fitment by VIN before ordering.
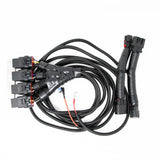 14-15 Sierra Non SLT/Denali to '16-'18 GMC Sierra 1/2 Ton HID
$389.99Headlight harnesses and assemblies. Confirm fitment by VIN before ordering.
14-15 Sierra Non SLT/Denali to '16-'18 GMC Sierra 1/2 Ton HID
$389.99Headlight harnesses and assemblies. Confirm fitment by VIN before ordering.
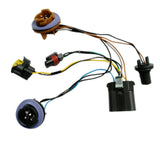 Headlight Wiring Harness For Chevy Tahoe Suburban Avalanche
$56.10Headlight harnesses and assemblies. Confirm fitment by VIN before ordering.
Headlight Wiring Harness For Chevy Tahoe Suburban Avalanche
$56.10Headlight harnesses and assemblies. Confirm fitment by VIN before ordering.
Frequently Asked Questions
Why does my GM show a headlight out warning after fitting LEDs?
Because the body control module detects a burned-out bulb by measuring current. A halogen low beam draws roughly 55 watts; an LED drawing a fraction of that looks identical to a dead filament. A CANbus decoder wired in parallel presents the circuit with something closer to a halogen's draw.
Why do my LED headlights flicker?
GM runs the daytime running light function by pulse-width modulating the headlight circuit. A halogen filament has enough thermal mass to glow steadily through that switching; an LED driver responds instantly, so you see it as flicker. If it only happens in DRL mode and stops with headlights fully on, PWM is confirmed — fit an anti-flicker capacitor harness.
What causes hyperflash on LED turn signals?
The signal circuit thinks a bulb is out. Replacing an incandescent with an LED drops the load far enough to trigger outage detection, doubling the flash rate. Load resistors restore the missing load, but they get genuinely hot — mount them to bare metal, away from looms and plastic. Bulbs with built-in load are the cleaner fix.
Will LED bulbs work in my reflector headlights?
That is the highest-risk swap. A reflector housing is itself the optic, tuned to a filament in a precise location, so LED chips on flat planes throw light above the cutoff. Projector housings are far more forgiving because the lens and cutoff shield do the shaping.
Are LED conversion bulbs street legal?
Not in the strict federal sense. Under FMVSS 108 a headlight assembly is certified as a system with a specific light source, and an LED bulb in a halogen-certified housing falls outside that. NHTSA does not approve individual equipment items at all — the DOT marking on a package is a manufacturer's self-certification claim, not government approval.
Can I put LED bulbs in factory HID projectors?
No. A factory HID system uses a different socket, a ballast and an igniter. It is a different problem entirely, not a bulb swap. Factory sealed LED assemblies have nothing to convert either — replacing the assembly is the only path.
How do I find the right bulb size for my GM?
Pull the bulb out and read the code moulded into the base. Sizes are not consistent across a single model year on GM trucks, because different trims got different housings and mid-generation refreshes changed sockets. Never order by model name alone.
My LEDs flicker with the headlights fully on, not just in DRL. Why?
That is not PWM. Flicker on both beams at all times points at a poor ground, a corroded connector, or low system voltage. Fix the ground first — adding a decoder to a bad ground hides a fault rather than solving it.
Do I need to re-aim the headlights after an LED conversion?
Yes, and it is the step most people skip. Park square to a flat wall about 25 feet away on level ground, and set the cutoff below the height of the headlight centre and level side to side. A beam aimed slightly high puts glare into oncoming windshields at exactly the distance that matters.
Which LED upgrade is the safest bet?
Fog lights. Wide, low, short-range beam, less demanding optics, and a different legal position from headlamps. Reverse lamps make the biggest practical difference at night. Headlight conversions in reflector housings are the riskiest.
A Note on Sourcing
The legal position is drawn from FMVSS 108 and NHTSA's certification framework, under which headlight assemblies are certified as complete systems with a specified light source and manufacturers self-certify rather than obtaining approval. This page states what the standard says and separately describes that enforcement varies by state — the second is an observation about practice, not legal advice.
Lamp-outage monitoring and DRL strategy vary by model, model year and trim, which is why this page gives no list of which GM vehicles need decoders. Anyone publishing one is guessing. The pattern — newer and higher-trim vehicles supervise circuits more aggressively — is reliable; a per-model table would not be.
Bulb sizes are not consistent within a model year because trims received different housings. The code moulded into the base of the bulb in your own vehicle is authoritative.
The beam pattern assessment is our own, based on how reflector and projector optics are designed around a filament position. We sell LED bulbs, and the position stated here is that a reflector-housing conversion is the highest-risk purchase on the page.
More electrical and accessory guides are collected in our GM parts and accessories library.
Build the whole kit in one order
An LED headlight conversion that works the first time is four parts, not one:
- LED bulbs in the correct size for your housing, with proper EMC shielding
- A CANbus decoder or load module per headlight circuit
- An anti-flicker capacitor harness if your DRL circuit uses PWM dimming
- Load resistors if the turn signals are going LED at the same time
Put them together from aftermarket lighting accessories and confirm the bulb size against the bulb you pull out of your own vehicle before you order.