
A GM brake hardware kit is the small stuff that lives between your pads and your caliper bracket: abutment clips, anti-rattle springs, guide pin bushings and boots, and sometimes the guide pins themselves. Reusing 80,000-mile hardware with new pads is the single most common reason a fresh brake job squeals, drags, or wears one pad out twice as fast as the other.
New pads are stamped to a tight thickness. The clips they slide on are not — they corrode, they lose spring tension, and they build up a layer of rust scale underneath that pinches the pad ear. You can buy the right brake hardware for your Silverado, Sierra, Tahoe or Yukon for a fraction of what the pads cost, and it is the difference between a quiet brake job and a comeback.
Parts and tools you'll need
- Caliper hardware kit and slide pin kit for your GM model — buy them at the same time you buy pads, not after
- High-temperature silicone caliper guide pin grease (the kind that comes in the ACDelco kit, not chassis grease)
- Synthetic brake lubricant or anti-seize rated for pad abutment surfaces — and see the copper paste section below, because GM specifies something particular here
- A calibrated torque wrench and basic hand tools — a wire brush, a small pick, and a C-clamp or piston tool
Hardware kits
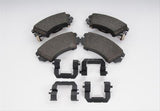 ACDelco Brake Pads, OE Replacement, Hardware Included
$169.99Brake hardware kits — confirm axle and RPO. Confirm fitment by VIN before ordering.
ACDelco Brake Pads, OE Replacement, Hardware Included
$169.99Brake hardware kits — confirm axle and RPO. Confirm fitment by VIN before ordering.
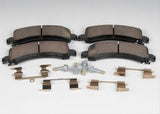 ACDelco Brake Pads, OE Replacement, Hardware Included
$170.99Brake hardware kits — confirm axle and RPO. Confirm fitment by VIN before ordering.
ACDelco Brake Pads, OE Replacement, Hardware Included
$170.99Brake hardware kits — confirm axle and RPO. Confirm fitment by VIN before ordering.
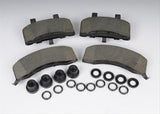 ACDelco Brake Pads, OE Replacement, Hardware Included
$111.99Brake hardware kits — confirm axle and RPO. Confirm fitment by VIN before ordering.
ACDelco Brake Pads, OE Replacement, Hardware Included
$111.99Brake hardware kits — confirm axle and RPO. Confirm fitment by VIN before ordering.
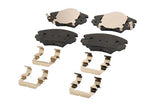 ACDelco Brake Pads, OE Replacement, Hardware Included
$204.99Brake hardware kits — confirm axle and RPO. Confirm fitment by VIN before ordering.
ACDelco Brake Pads, OE Replacement, Hardware Included
$204.99Brake hardware kits — confirm axle and RPO. Confirm fitment by VIN before ordering.
What is actually in a GM brake hardware kit?
Most ACDelco and GM Genuine Parts hardware kits contain the pad abutment clips (also called pad slides), anti-rattle springs or pad separators, guide pin bushings and boots, and a packet of silicone grease. Some kits add the guide pins themselves. None of them include pads, rotors, or the caliper bracket.
GM does not use one universal kit. The catalog descriptions are specific and they tell you what you are buying if you read them literally. A kit described as "with clips, seals, and lubricant" is a different part from one described as "with clips, seals, and bushings," and both are different from a "guide pin kit with guide pins."
Here is how the naming maps to contents on real ACDelco Gold part numbers:
| ACDelco number | GM number | Catalog description | What that means you get |
|---|---|---|---|
| 18K1740X | 19241673 | Front caliper hardware kit with clips, seals and lubricant | Abutment clips, pin boots/seals, grease packet — no metal pins |
| 18K1735X | 19241668 | Front caliper hardware kit with clips, seals and lubricant | Same content class as above, different caliper family |
| 18K1761X | 19241694 | Front caliper hardware kit with clips, seals and bushings | Adds the rubber guide pin bushings the pin rides inside |
| 18K5871 | 19313388 | Front caliper hardware kit with clips, springs, seals and bushings | The most complete class — includes anti-rattle springs |
| 18K281X | 19261290 | Front caliper hardware kit with clips and pins | Includes the guide pins; listed for 1988–1992 Camaro and 1988–1996 Corvette |
| 179-1370 | 18046666 | Front caliper guide pin kit with guide pins | Steel pins 0.353 in diameter, 3.461 in long, plus fine-thread bolts and grease |
Read that table as a guide to what the words mean, not as a fitment chart. Except where a specific model range is called out above, do not order any of these numbers on the strength of a blog post — including this one. Pull your VIN, use the fitment filter on the collection page, and confirm the caliper family before you check out. GM ran multiple caliper suppliers in the same model year on the same truck, and the hardware is not interchangeable between them.
Do you really need new hardware with every pad change?
Yes on anything that has seen a winter with road salt, and yes on any vehicle past about 60,000 miles. No, not strictly, on a two-year-old truck from a dry state where the clips still snap into place and the pad ears slide by hand. The clips are cheap enough that the inspection usually costs more time than the parts cost money.
The failure is mechanical, not cosmetic. Abutment clips are thin stainless or coated steel formed with a spring bend that keeps the pad ear centered and lets it slide freely under braking. Heat cycling relaxes that bend. Once the clip loses tension, the pad rattles when you go over a bump and chatters when you brake lightly.
The worse version is corrosion underneath the clip. Water wicks between the clip and the bracket, rust forms, and the rust has volume. It lifts the clip a millimeter or two into the pad slot, and now your brand new pad is a press fit where it should be a slip fit. That pad stays partially applied after you lift off the pedal. It cooks, it wears fast, and it drags fuel economy down measurably.
If you have ever pulled a wheel and found one pad at 2 mm and its partner at 8 mm on the same caliper, this is usually why. It is also a large share of what people are hearing when they describe a grinding or scraping noise — worth reading how to tell brake noises apart before you start buying parts, because the fix for a seized slide is different from the fix for a worn-out pad.
What do caliper slide pins do, and why do they seize?
A floating caliper only has pistons on the inboard side. When you press the pedal, the piston pushes the inner pad into the rotor, and the reaction force slides the whole caliper body inward on two guide pins so the outer pad is pulled against the other face. If the pins do not slide, the outer pad never applies with full force.
The pins ride inside rubber bushings, sealed at each end by an accordion boot. Two things kill them. The boot tears or hardens, water gets in, and the pin corrodes to the bushing. Or the pin gets greased with the wrong lubricant — a petroleum grease swells and destroys the rubber bushing from the inside, which feels exactly like a seized pin within about a year.
That is why the silicone packet in the kit matters. Guide pin grease has to be compatible with EPDM rubber and stable at brake temperatures. Chassis grease, bearing grease, and generic red or blue lithium grease are not.
Symptoms of a seized slide pin, in the order most people notice them:
- Uneven pad wear inboard to outboard on the same wheel, often 3 mm or more of difference.
- A pull toward one side under moderate braking that goes away at a stop.
- Heat coming off one wheel after a highway drive with light brake use.
- A rotor on one side that blues or scores while the other side looks fine.
- A caliper you cannot push back by hand with the pads out.
Check them with the caliper off and the pads out: pull each pin from the bracket, wipe it, and look at the shank. A good pin is smooth and uniform. A bad one is pitted, has a rust band where the bushing sat, or shows a polished flat spot from binding. Any of those and it gets replaced, not cleaned.
Calipers and brackets
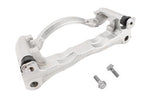 ACDelco Brake Caliper Mounting Brackets, ACDelco Brake
$92.99Caliper brackets and calipers. Confirm fitment by VIN before ordering.
ACDelco Brake Caliper Mounting Brackets, ACDelco Brake
$92.99Caliper brackets and calipers. Confirm fitment by VIN before ordering.
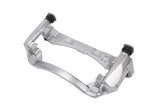 ACDelco Brake Caliper Mounting Brackets, ACDelco Brake
$97.99Caliper brackets and calipers. Confirm fitment by VIN before ordering.
ACDelco Brake Caliper Mounting Brackets, ACDelco Brake
$97.99Caliper brackets and calipers. Confirm fitment by VIN before ordering.
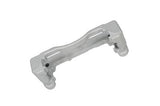 ACDelco Brake Caliper Bracket, Replacement, Iron
$109.99Caliper brackets and calipers. Confirm fitment by VIN before ordering.
ACDelco Brake Caliper Bracket, Replacement, Iron
$109.99Caliper brackets and calipers. Confirm fitment by VIN before ordering.
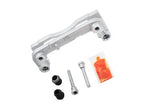 ACDelco Brake Caliper Mounting Brackets, ACDelco Brake
$114.99Caliper brackets and calipers. Confirm fitment by VIN before ordering.
ACDelco Brake Caliper Mounting Brackets, ACDelco Brake
$114.99Caliper brackets and calipers. Confirm fitment by VIN before ordering.
Copper paste on the pad abutments: what GM actually specifies
This section is the one worth reading twice, because it is GM's own instruction and almost nobody follows it on a driveway brake job.
GM's bulletin 17-NA-040, "Brake Squeal or Squeak Noise Intermittently on Initial Brake Applies," prescribes applying copper paste to completely cover the pad backing plate abutments on each end — the parts of the pad that contact the caliper bracket. The quantity is specific: approximately 0.10 g, about 0.0035 oz, at each end. GM's own illustrations show both a correct amount and an incorrect, too-light application.
The paste must not extend onto the friction material. That is the one hard boundary.
Three things follow from that bulletin that change how you should work.
Apply it whenever the pads come out. GM states the copper paste should be applied whenever brake pads are removed or replaced — not only when chasing a noise complaint.
Pressure washing removes it. GM warns that wheel cleaners or a power washer pointed directly at the caliper can wash the copper paste off the pads, and that it may need reapplying. If your brakes started squealing shortly after a detail or a trip through a touchless wash, that is a real mechanism, not a coincidence.
Do not replace pads for this condition. GM says so explicitly. A squeal on initial applies after the vehicle has sat, at light pressure and low speed, that goes away after a handful of stops, is a lubrication issue at the abutments rather than a worn-out pad.
What the squeal frequency tells you
GM's preliminary information document PIC6429A adds a detail that reframes the whole noise conversation: on the vehicles it covers, the most common brake squeal frequencies fall in the 2,000 to 4,000 hertz range, which is exactly the band the copper paste is applied at the factory to damp.
Noises above roughly 4 kHz are typically not affected by the paste, and GM describes them as normal for that braking system. That is a useful expectation to have before you spend a weekend chasing a sound that is characteristic rather than faulty — GM notes that most brake noise cases reaching its technical assistance centre turn out to need no parts at all.
What do brake shims actually do?
A shim is a thin laminated plate — usually steel bonded to a rubber or elastomer layer — that sits between the pad backing plate and the caliper piston or finger. It does not stop the car. It de-tunes the vibration that makes brakes squeal, by breaking the frequency coupling between the pad and the caliper.
Brake squeal is a resonance problem. The pad, rotor, and caliper form a system with a natural frequency, and under the right pressure and temperature that system rings in a band your ears hate — with the most commonly reported complaints, per GM, concentrated between 2 and 4 kHz. The shim adds damping and mass at the interface, which shifts the resonance out of that band.
Two practical implications. First, if your new pads came with shims bonded to the backing plate, do not peel them off and do not stack the old ones on top. Second, if the shims are loose-fit rather than bonded, they migrate — the trade term is shim migration — and a migrated shim can hang the pad in the bracket. That is when a shim causes the exact noise it was supposed to prevent.
Some GM pad sets ship with the clips included, described in the catalog as a "pad set with clips." If yours does, you may not need a separate hardware kit for the abutment clips, but you will still likely want the pin and boot hardware. Check the pad set description before you double-buy.
How do you tell your hardware is bad before you order?
Pull one front wheel, look at four things: whether the pad ears slide by finger pressure in the bracket, whether the clips are still spring-loaded and unlifted by rust, whether the pin boots are intact, and whether the two pads on that caliper are within about 2 mm of each other. Any failure means order hardware.
Do this before you order rather than after, because it changes what you buy. A truck with clean clips and torn boots needs a pin and boot kit. A truck with rusted-solid clips and good pins needs the clip kit. A salt-belt truck at 100,000 miles usually needs both, and sometimes the bracket too, because once the abutment surface is pitted deeply enough, a new clip will not seat flat on it.
Bracket condition is the judgment call most people get wrong. Wire-brush the abutment surface down to bare metal. If it comes out flat and smooth, the clip will seat. If there is a visible crater where the clip was, the new clip will rock and you are buying the whole job again in a year.
How do you install brake hardware correctly?
The order matters more than the technique. Doing this out of sequence is how people end up greasing an abutment clip and then wondering why the pads move around.
- Loosen the lug nuts, raise the vehicle, support it on jack stands rated for its weight, and remove the wheel.
- Remove the two caliper guide pin bolts and lift the caliper off. Support it with a hook or a wire — never let it hang by the flexible brake hose.
- Remove the pads and note which way the wear sensor and any anti-rattle spring were oriented. Photograph it if there is any doubt.
- Remove the caliper bracket bolts and take the bracket to the bench.
- Pry the old abutment clips out. They are usually held by a folded tab, and they come out easier than they look.
- Wire-brush the abutment surfaces to clean bare metal. Remove all rust scale from under where the clip sat. This step is the whole job.
- Press each new clip fully home until the retaining tab snaps over the edge. A clip that is not fully seated will rock and rattle.
- Apply a thin film of brake-rated lubricant to the pad contact face of the clip only. Not to the bracket, not to the pad ear, and never to the friction material.
- Clean both ends of the pad abutment areas and apply copper paste per GM 17-NA-040 — roughly 0.10 g at each end of the pad backing plate abutment, keeping it off the friction material.
- Pull each guide pin, clean or replace it, install the new bushing and boot, and coat the pin shank with the silicone grease from the kit.
- Reinstall the pin into the bracket and work it in and out several times. It should move with light finger pressure through its full travel.
- Reinstall the bracket, then the pads, then the caliper. Torque every fastener to the specification for your vehicle.
- Reinstall the wheel, lower the vehicle, and torque the lug nuts in a star pattern.
- Pump the pedal until it is firm before you move the vehicle. The first press after a pad change travels a long way.
- Bed the pads in per the pad manufacturer's instructions, and re-check lug nut torque after roughly 50 to 100 miles.
Torque specifications: caliper bracket bolts, guide pin bolts, and lug nut torque all vary by model, year, brake package and wheel type on GM vehicles, and the numbers circulating on forums frequently contradict each other. Get the figures for your exact vehicle from a factory service manual or a subscription service manual before you tighten anything, and check the placard in your driver's door jamb for the lug nut spec. A guide pin bolt over-torqued to a bracket-bolt figure will distort the bushing and bind the caliper, which is the opposite of what you just paid to fix.
Which grease goes where?
Three different products, three different jobs, and mixing them up causes real failures.
| Location | What to use | Why |
|---|---|---|
| Guide pin shank and inside the bushing | Silicone caliper guide pin grease (the packet in the ACDelco kit) | Must be compatible with the rubber bushing and boot; petroleum products swell and destroy them |
| Pad backing plate abutment ends (where the pad contacts the bracket) | Copper paste, approximately 0.10 g each end | GM's specified anti-squeal treatment per bulletin 17-NA-040 — targets the 2–4 kHz squeal band |
| Pad ear contact face on the abutment clip | Synthetic brake lubricant or a thin brake-rated anti-seize | Metal-to-metal sliding surface at high temperature |
| Back of the pad where it touches the piston or caliper finger | A very light film of brake lubricant, only if the pad has no bonded shim | Damps vibration; skip it entirely if a shim is already bonded on |
| Rotor face, friction material, pad edges | Nothing, ever | Contaminated friction material cannot be cleaned and must be replaced |
What is NOT in a hardware kit?
Hardware kits do not include pads, rotors, caliper brackets, caliper bodies, brake hoses, or the caliper bracket-to-knuckle bolts. Some kits include the guide pin bolts and some do not — read the description. If your bracket bolts are torque-to-yield or have pre-applied thread locker, they are single-use and you need new ones separately.
Also worth knowing: rear brakes on many GM trucks and SUVs have a small drum parking brake inside the rear rotor hat, with its own separate hardware — shoes, springs, and adjusters. That is a different part from a rear caliper hardware kit, and it is the thing people forget when the parking brake stops holding on a hill.
Scope: what this covers and what it does not
Everything above applies to floating and sliding caliper disc brakes, which is nearly every Chevrolet, GMC, Buick and Cadillac light-duty vehicle on the road. It does not apply the same way to fixed multi-piston calipers — Brembo front brakes on performance Camaro, Corvette, CT4-V and CT5-V models, and some heavy-duty packages — because a fixed caliper has no guide pins at all. On those, the hardware is pad retaining pins, anti-rattle springs and clips, and the failure modes are different.
The copper paste guidance does apply to those performance cars, though — GM's bulletin covers Corvette, ATS, CTS, CT6, Regal GS and SS among others, and its C8 Corvette document notes the paste is applied at the factory during assembly.
Heavy-duty 2500 and 3500 trucks use larger caliper families than half-tons of the same model year, and the hardware does not cross over. A 2019 Silverado 1500 kit is not a 2019 Silverado 2500HD kit. The same is true across generation breaks: the 2014–2018 K2XX trucks and the 2019 and newer T1XX trucks are different platforms with different brake hardware.
What to check before you order
- Your exact year, model, cab configuration and drivetrain — and for HD trucks, the GVWR and brake package.
- Front or rear. They are separate kits and they are not interchangeable.
- Whether your new pad set already includes clips, so you do not buy them twice.
- Whether you need pins as well as clips, based on the boot and pin inspection above.
- Whether the bracket abutment surfaces are still flat enough to seat a new clip.
- The correct lubricants — silicone for the pins, and copper paste for the pad abutments. If your kit does not include both, add them to the order.
Brakes are the one system where a shortcut has a consequence you cannot argue with. Support the vehicle on rated jack stands, never under a jack alone, and confirm you have a firm pedal before the vehicle moves under its own power. If you find a torn brake hose, a leaking caliper piston, or a cracked bracket during the inspection, stop and fix that first — hardware will not compensate for it.
Pads and tools
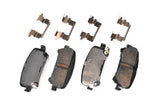 ACDelco Brake Pads, OE Replacement
$180.99Pads and torque tools to finish the job. Confirm fitment by VIN before ordering.
ACDelco Brake Pads, OE Replacement
$180.99Pads and torque tools to finish the job. Confirm fitment by VIN before ordering.
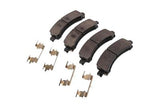 ACDelco Brake Pads, OE Replacement
$142.99Pads and torque tools to finish the job. Confirm fitment by VIN before ordering.
ACDelco Brake Pads, OE Replacement
$142.99Pads and torque tools to finish the job. Confirm fitment by VIN before ordering.
 ACDelco Brake Pads, OE Replacement
$157.99Pads and torque tools to finish the job. Confirm fitment by VIN before ordering.
ACDelco Brake Pads, OE Replacement
$157.99Pads and torque tools to finish the job. Confirm fitment by VIN before ordering.
 ACDelco Brake Pads, Gold Ceramic
$88.99Pads and torque tools to finish the job. Confirm fitment by VIN before ordering.
ACDelco Brake Pads, Gold Ceramic
$88.99Pads and torque tools to finish the job. Confirm fitment by VIN before ordering.


Frequently Asked Questions
Do I need new brake hardware every time I change pads?
On any vehicle that has seen road salt, or past roughly 60,000 miles, yes. On a young truck from a dry state where the clips still snap in and the pad ears slide by finger pressure, not strictly. The clips cost a fraction of the pads, and the inspection takes longer than the parts cost, so most people are better off replacing them.
Why did my brakes squeal right after I washed the truck?
That is a documented mechanism, not bad luck. GM warns in bulletin 17-NA-040 that wheel cleaners or a power washer pointed directly at the caliper can wash the copper paste off the pad abutments, and that it may need reapplying. A squeal that appears after a detail or a touchless wash is a lubrication problem, not a worn pad.
What does GM say to put on the brake pad abutments?
Copper paste, approximately 0.10 g (0.0035 oz) at each end of the pad backing plate abutment, applied so it completely covers the abutment area without extending onto the friction material. GM specifies this whenever the pads are removed or replaced, not only when chasing a noise complaint.
Should I replace the pads to cure a squeal?
Usually not, and GM says so explicitly for this condition. A squeal on the first few applies after the vehicle has sat, at low speed and light pedal, that disappears after a handful of stops, is an abutment lubrication issue. GM's guidance is to clean the abutments and apply copper paste rather than fit new pads.
Are all brake squeals fixable?
No, and this is worth knowing before you spend a weekend on it. GM reports that the most common squeal frequencies fall in the 2,000 to 4,000 hertz band, which is what the copper paste is there to damp. Noises above roughly 4 kHz are typically not affected by the paste and are described as normal for that braking system. Most brake noise cases reaching GM's technical assistance centre need no parts at all.
How do I know if a caliper slide pin is seized?
The clearest sign is uneven pad wear on the same wheel, often 3 mm or more between inboard and outboard. Others are a pull under moderate braking that vanishes at a stop, heat coming off one wheel after a light-braking highway run, and one rotor blued or scored while its opposite looks fine. With the pads out, a good pin slides with light finger pressure through its full travel.
What grease should I use on caliper guide pins?
Silicone caliper guide pin grease, which is what comes in the ACDelco kit. It has to be compatible with the rubber bushing and boot. Petroleum-based greases, including chassis grease, bearing grease and generic lithium products, swell the rubber and destroy the bushing from the inside, which feels exactly like a seized pin within about a year.
What do brake shims do, and should I reuse mine?
Shims damp vibration at the pad-to-caliper interface, shifting the resonance out of the band that produces squeal. They contribute nothing to stopping the car. If your new pads have shims bonded to the backing plate, do not peel them off and do not stack the old ones on top. Loose shims can migrate and hang the pad in the bracket, causing the noise they were meant to prevent.
Can I just clean and reuse my old slide pins?
Only if the shank is smooth and uniform. A pin with pitting, a rust band where the bushing sat, or a polished flat spot from binding gets replaced rather than cleaned. The bushing and boot should be replaced regardless, because a hardened or torn boot is what let the water in that caused the problem.
Does this apply to Brembo or performance brakes?
The slide pin and abutment clip content does not, because fixed multi-piston calipers have no guide pins. Their hardware is pad retaining pins, springs and clips instead. The copper paste guidance does apply, however — GM's bulletin covers Corvette, ATS, CTS, CT6 and other performance models, and the paste is applied to the C8 Corvette at the factory.
A Note on Sourcing
The copper paste specification, the quantity, the pressure-washing warning and the instruction not to replace pads for this condition come from GM service bulletin 17-NA-040, August 2020 revision (PDF), published by NHTSA as a manufacturer communication and read directly.
The squeal frequency figures — the 2 to 4 kHz band the paste targets, and the note that noises above roughly 4 kHz are typically normal — come from GM preliminary information document PIC6429A (PDF), also read directly. That document is written around the C8 Corvette; the frequency principle is general, but the specific vehicle coverage is not.
Part numbers and catalog descriptions are from GM and ACDelco listings. They are included to show how kit naming maps to contents, not as a fitment chart, and the page says so above.
The inspection thresholds, wear symptoms and installation sequence are our own, based on service practice rather than a GM procedure. Torque figures are deliberately omitted because they vary by model, year and brake package, and a wrong figure here would do real harm.
For the rest of the routine service items on a GM truck or SUV, there are more GM repair and maintenance guides covering the jobs that tend to come due at the same mileage. And if the reason you are here is a noise rather than a wear inspection, start by identifying the sound — squeal, grind and clunk each point at a different part.
Do the whole job in one order
A complete GM brake refresh on one axle is a short list. Order it together so you are not stopped mid-job with the wheel off:
- Pad set for your exact year, model and axle
- Caliper hardware kit — abutment clips, anti-rattle springs, boots
- Guide pin kit if the pins are pitted or the boots are torn
- Silicone guide pin grease, brake-rated abutment lubricant, and copper paste for the pad abutments
- Rotors, if yours are below the minimum thickness stamped on the hat
All of it lives in one place: GM brake parts and hardware for Chevrolet, GMC, Buick and Cadillac. Filter by your year, model and engine, and confirm front versus rear before you check out. If you are also short on the tools to do it right, the torque wrenches and brake service tools are worth the one-time spend — every fastener in this job has a specification, and guessing at them is how a good brake job turns into a bad one.