
For most GM DIY work, buy a 1/2-inch drive click wrench first and a 3/8-inch drive second. That pair covers lug nuts, suspension and brake hardware at the top end and engine accessory bolts at the bottom. A beam wrench is the cheapest honest tool you can own and never drifts out of calibration. Digital is worth the money only if you do torque-plus-angle work.
That is the whole answer. What follows is why, where each type fails, how accuracy standards actually work, and how to pick a range so your most common job does not land in the part of the scale where the wrench lies to you. If you already know the drive size you need, start with torque wrenches and shop tools for GM work.
Parts and tools you'll need
- Torque wrenches, sockets and hand tools — the 1/2-inch and 3/8-inch pair is the core
- Popular garage and maintenance gear for your GM truck or SUV
- Impact-rated sockets if you will ever put a gun on them — chrome sockets shatter
- A hard case or drawer liner. A torque wrench that rolls around a toolbox is a torque wrench that reads wrong.
Digital torque wrenches
 ACDelco Tools Torque Wrenches, Digital LCD Display, 1/2 in.
$162.99ACDelco digital torque wrenches in 1/4, 3/8 and 1/2-inch drive.
ACDelco Tools Torque Wrenches, Digital LCD Display, 1/2 in.
$162.99ACDelco digital torque wrenches in 1/4, 3/8 and 1/2-inch drive.
 ACDelco Tools Torque Wrenches, Digital LCD Display, 3/8 in.
$249.99ACDelco digital torque wrenches in 1/4, 3/8 and 1/2-inch drive.
ACDelco Tools Torque Wrenches, Digital LCD Display, 3/8 in.
$249.99ACDelco digital torque wrenches in 1/4, 3/8 and 1/2-inch drive.
 ACDelco Tools Torque Wrenches, Digital LCD Display, 3/8 in.
$126.99ACDelco digital torque wrenches in 1/4, 3/8 and 1/2-inch drive.
ACDelco Tools Torque Wrenches, Digital LCD Display, 3/8 in.
$126.99ACDelco digital torque wrenches in 1/4, 3/8 and 1/2-inch drive.
 ACDelco Tools Torque Wrenches, Digital LCD Display, 1/2 in.
$312.99ACDelco digital torque wrenches in 1/4, 3/8 and 1/2-inch drive.
ACDelco Tools Torque Wrenches, Digital LCD Display, 1/2 in.
$312.99ACDelco digital torque wrenches in 1/4, 3/8 and 1/2-inch drive.


Which torque wrench should you buy first?
A 1/2-inch drive click wrench. It handles lug nuts, control arm bolts, brake caliper brackets, driveshaft flanges and most chassis hardware on a Silverado, Sierra, Tahoe or Suburban. It is the one job you cannot do safely by feel, and it is the one wrench that pays for itself the first time you rotate your own tires.
The mistake is buying only a 1/2-inch and then trying to use it on small fasteners. A 1/2-inch wrench cannot resolve 90 in-lb. Ask it to and you will strip an aluminum thermostat housing or a water pump boss — the exact failure that turns a two-hour job into an engine-out job.
So the second purchase is a 3/8-inch drive, and for anyone who works on engines, a 1/4-inch drive that reads in inch-pounds is the third. Plenty of GM engine specs live at 90 in-lb, which is 7.5 lb-ft. That number does not exist in any useful way on a 1/2-inch wrench's dial.
You do not need three wrenches on day one. You do need to know which one your next job actually calls for before you turn a fastener.
Click, beam or digital: what's the real difference?
A click wrench has a spring-loaded clutch that releases audibly at a preset value. A beam wrench has a deflecting bar and a pointer that reads live on a scale. A digital wrench uses a strain gauge and reads out on a screen, usually with angle measurement and an alarm. Each fails differently, and that is the deciding factor.
| Type | How you read it | Strengths | Weaknesses | Best for |
|---|---|---|---|---|
| Beam | Pointer on a printed scale, live | No mechanism to wear out; effectively holds calibration; cheapest; shows you the whole pull | You must see the scale, which is impossible on many under-car fasteners; no click to tell you to stop | Anyone on a budget, and any job where you can see the tool |
| Click / micrometer | Preset a value; it clicks when reached | Works blind; fast for repetitive fasteners like lug nuts; wide range of sizes | Spring mechanism drifts; must be stored at the lowest setting; easy to overshoot past the click | Lug nuts, suspension, brakes, most chassis work |
| Deflecting beam / split beam | Preset a value; audible and tactile signal | No main spring under constant load, so no need to dial down for storage | Costs more than a basic click wrench; fewer models available | People who forget to unwind a click wrench |
| Dial | Dial indicator, live, often with a preset signal | Very readable; good for checking existing torque | Bulky; needs line of sight; more fragile if dropped | Bench and inspection work |
| Digital / electronic | Screen readout with audible and vibrating alerts | Does torque-plus-angle; can log values; some read in multiple units | Batteries; screen glare; still needs calibration; the most expensive option | Torque-to-yield fasteners and angle specs |
If you take one thing from that table, take this: the beam wrench is underrated and the digital wrench is oversold. A beam wrench has no clutch, no spring under load and nothing to go out of adjustment. For a DIYer doing a dozen jobs a year in a driveway, it is often the more trustworthy tool.
The case for a click wrench is not accuracy, it is ergonomics. Reaching up behind a brake caliper, you cannot see a pointer. You can hear and feel a click. That is a real advantage and it is why click wrenches dominate.
The case for digital is narrow and specific: angle. More on that below.
What drive size do you need for GM work?
Three drive sizes cover essentially everything a home mechanic touches on a GM vehicle. The 1/2-inch handles the big chassis fasteners, the 3/8-inch handles the middle, and the 1/4-inch handles small engine and interior hardware measured in inch-pounds. Buy for the fasteners you actually turn, not for the biggest number on the box.
| Drive size | Typical units | GM jobs it covers | Buy it when |
|---|---|---|---|
| 1/4 in | Inch-pounds | Valve covers, intake and accessory bolts, sensor bosses, plastic and aluminum housings | You work on engines at all |
| 3/8 in | Foot-pounds, lower end | Spark plugs, water pump and thermostat housings, brake caliper bolts, oil pan drain plugs | Second purchase for almost everyone |
| 1/2 in | Foot-pounds | Lug nuts, control arms, shock and strut hardware, caliper brackets, driveshaft flanges | First purchase for almost everyone |
| 3/4 in and up | Foot-pounds, high | Heavy truck axle and suspension work | Rarely, for a DIY GM owner |
Torque ranges vary between manufacturers even within the same drive size, so read the range printed on the specific wrench rather than assuming a 1/2-inch covers what you need. Two 1/2-inch wrenches from different brands can start and stop at meaningfully different values.
Do not solve the range problem with adapters. A 3/8-to-1/2 step-up adapter does not change the wrench's calibrated range, and any extension that moves the fastener away from the drive centerline changes the effective torque. Buy the right size instead.
What torque range should the wrench cover?
Pick a wrench whose range puts your most common spec comfortably in the middle. Click wrenches are least accurate at the very bottom of their scale, and the standard advice is to avoid the lowest fifth of the range entirely. A wrench set near its floor is the single most common source of a bad reading in a home garage.
Work it backwards. Write down the three or four specs you use most — your lug nut spec, your brake caliper bolt spec, your drain plug spec — and then buy so that none of them sits at the extreme end of any wrench you own. Check your wrench's own documentation for the range it is verified across, because that varies by model.
The same logic applies at the top. A wrench used at its absolute maximum is being asked to do the thing it is worst at, and you will also be leaning on it hard enough that your body position, not the tool, determines the result.
Where does a lug nut spec actually fall?
It depends on your vehicle, wheel type and model year, and the placard on your driver's door jamb or your owner's manual is the authority. As a sizing guide only: full-size GM trucks and SUVs — Silverado, Sierra, Tahoe, Suburban, Yukon, Escalade — commonly specify 140 lb-ft on M14 x 1.5 studs with a 22 mm socket, which is consistent enough across that platform to plan a purchase around.
Cars and crossovers are lower and vary much more. Aluminum and steel wheels on the same vehicle can carry different specs, and aftermarket wheels can differ again. Buy a wrench whose range brackets your figure with room on both sides — a wrench topping out at 150 lb-ft is a poor choice for a 140 lb-ft spec.
How accurate does a torque wrench need to be?
Consumer torque wrenches are built to ISO 6789 or ASME B107.300. ISO 6789 defines two types across twelve classes: tolerances are about ±6% for values at or below 10 N·m and typically ±4% above that. ASME B107.300 uses similar type designations with tolerances ranging from roughly ±0.8% to ±4% depending on the tool and range.
In practice, ±4% is far tighter than what you achieve by feel, and it is plenty for every fastener on a consumer GM vehicle. A wrench that claims ±3% is not meaningfully better in your driveway than one that claims ±4%. Spend the difference on the right drive size instead.
What matters more than the headline percentage is whether the manufacturer says what standard the tool is built and verified to, and whether it ships with a test certificate. A wrench that just says "accurate" with no standard named is telling you something.
ASME B107.300 also recognizes a Type 3 limiting tool, which releases the drive once the set torque is reached rather than merely signaling it. Those are common in production settings and less common in consumer catalogs, but if you see the term, that is what it means.
How often does a torque wrench need calibration?
ISO guidance calls for recalibration after 5,000 torque cycles or 12 months, whichever comes first. Tools can drift up to 10% out of calibration in their first year of use. For a home mechanic doing a handful of jobs a year, the cycle count is irrelevant and the calendar is the practical trigger.
Whether you actually send a wrench out for calibration is a judgment call. Professional calibration needs a reference device accurate to about ±1% and a controlled environment — roughly 18–28°C with tight temperature stability and controlled humidity. That is a real expense relative to an entry-level wrench.
The honest position for most DIY owners: buy a mid-grade click wrench, treat it well, replace it when it feels wrong or after several years of hard use, and do not pretend an uncalibrated fifteen-year-old wrench in a drawer is still a measuring instrument. If you want a tool that sidesteps this entirely, that is the argument for a beam wrench.
Treat-it-well means specific things. Store a click wrench dialed down to its lowest setting so the spring is not held compressed. Do not drop it. Do not use it as a breaker bar to loosen fasteners. Do not put a cheater pipe on it. Any one of those can put a wrench out of spec in a single afternoon.
Do you need torque-plus-angle?
You need it if you work on torque-to-yield fasteners, which GM uses widely. Those specs read like "7.5 lb-ft, then 45 degrees" — a seating torque followed by a measured rotation. A digital wrench with an angle mode does this in one motion; otherwise you need a separate angle gauge on your ratchet.
Water pump fasteners on the GM 3.6L V6 are a good example: published data lists new bolts as 7.5 lb-ft followed by an additional 45 degrees. Head bolts, some suspension hardware and various driveline fasteners follow the same pattern. If your project list includes any of those, angle capability is not a luxury. Always confirm the exact procedure for your engine and model year in service information rather than assuming.
The cheap alternative works fine. A dial-type angle gauge that clips between the ratchet and the socket does exactly one thing well, and it costs a fraction of what a digital wrench does. Many people buy the gauge, use it twice a year, and never regret skipping the electronics.
One rule that goes with all of this: torque-to-yield bolts are single-use. They are designed to stretch permanently. Reusing them is how a properly torqued joint leaks six months later. If the procedure calls for new bolts, buy new bolts.
Torque-angle adapters
 ACDelco Tools Digital Torque Adapters, 1/2 in. Square Drive
$94.99Digital torque adapters for torque-plus-angle fasteners.
ACDelco Tools Digital Torque Adapters, 1/2 in. Square Drive
$94.99Digital torque adapters for torque-plus-angle fasteners.

How do you use a torque wrench correctly?
Technique changes the result as much as the tool does. The steps below apply to any type.
- Look up the spec for your exact vehicle, year and fastener before you start. Do not work from memory.
- Clean the threads. Debris and corrosion absorb torque that should be creating clamp load.
- Check whether the spec calls for dry or lubricated threads, and follow it. A lubricated fastener torqued to a dry spec is significantly overtightened.
- Set the wrench to the value, and on a click wrench confirm the lock is engaged.
- Run the fastener down by hand or with a plain ratchet until it is snug. The torque wrench is for the final tightening only.
- Pull with one hand on the handle grip, smoothly, at a steady rate. Do not jerk it and do not add a second hand out on the end.
- Keep the pull perpendicular to the wrench and the socket square on the fastener.
- Stop the instant a click wrench clicks. The click is the end of the job, not a suggestion to keep going.
- On multi-fastener patterns like wheels, work in a star or crisscross sequence and go around at least twice.
- Dial a click wrench back to its lowest setting and put it away in its case.
Safety note: never rely on an impact gun for final torque, and never work under a vehicle supported only by a jack. Use rated jack stands on level ground. Wheel fasteners in particular deserve a second check after the first drive — recheck them shortly after any wheel removal, and follow the retorque interval your vehicle manufacturer specifies.
Should you use an impact gun at all?
Yes, for removal and for running fasteners down quickly, and no, for the final tightening. An impact gun's output varies with air pressure, tool condition, battery state and how long you hold the trigger. It is a speed tool, not a measuring tool, even the ones with torque settings printed on the housing.
The scale of the mismatch is worth stating plainly. A mid-range cordless impact can deliver well over 400 lb-ft on burst, against a target of 140. That is how wheel studs get stretched and how rotors end up distorted enough to feel like a warped pedal.
Torque sticks are a partial answer used in tire shops, and they are better than nothing, but they are still a ceiling rather than a measurement. If you are already going to the trouble of doing your own brake or suspension work, finish with the wrench.
If you run air tools, the pressure you feed them changes what they deliver, which is another reason not to trust a gun for a final spec. Our quick reference on air tool operating pressure covers how much difference that makes.
What to check before you order
- Confirm the drive size against your actual jobs. 1/2-inch for chassis, 3/8-inch for mid-range, 1/4-inch for inch-pound work.
- Read the printed torque range on the specific model, not the category. Ranges differ between brands at the same drive size.
- Make sure your most common spec is not in the bottom fifth of the range.
- Check which standard it is built to — ISO 6789 or ASME B107.300 — and whether a test certificate is included.
- Confirm the units. Inch-pound and foot-pound wrenches are not interchangeable and mixing them up is a classic way to destroy a thread.
- Add an angle gauge if any job on your list is a torque-plus-angle spec.
- Look up your vehicle's specs from the door jamb placard or owner's manual before you buy, so you are choosing a range around real numbers.
Sockets and tool sets
 APOLLO TOOLS - DT0004-50 Piece ¼” Drive Socket Set
$54.99Sockets and sets to go with your torque wrench.
APOLLO TOOLS - DT0004-50 Piece ¼” Drive Socket Set
$54.99Sockets and sets to go with your torque wrench.
 95 Piece Mechanics Tool Set in Metric and SAE for Small
$99.99Sockets and sets to go with your torque wrench.
95 Piece Mechanics Tool Set in Metric and SAE for Small
$99.99Sockets and sets to go with your torque wrench.
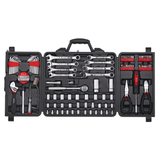 101 Piece Mechanic Tool Set for Vehicle and Home Maintenance
$69.99Sockets and sets to go with your torque wrench.
101 Piece Mechanic Tool Set for Vehicle and Home Maintenance
$69.99Sockets and sets to go with your torque wrench.
 56 Piece SAE Auto Tool Set In Zipper Case
$39.99Sockets and sets to go with your torque wrench.
56 Piece SAE Auto Tool Set In Zipper Case
$39.99Sockets and sets to go with your torque wrench.
 65 Piece Household and Mechanical Tool Set -- DT0001
$69.99Sockets and sets to go with your torque wrench.
65 Piece Household and Mechanical Tool Set -- DT0001
$69.99Sockets and sets to go with your torque wrench.
 56 Piece Metric Auto Tool Set In Zipper Case
$39.99Sockets and sets to go with your torque wrench.
56 Piece Metric Auto Tool Set In Zipper Case
$39.99Sockets and sets to go with your torque wrench.


Frequently Asked Questions
Which torque wrench should I buy first for GM work?
A 1/2-inch drive click wrench. It covers lug nuts, control arm bolts, caliper brackets and driveshaft flanges on a Silverado, Sierra, Tahoe or Suburban. Add a 3/8-inch second, and a 1/4-inch reading in inch-pounds third if you work on engines — plenty of GM engine specs live at 90 in-lb, which a 1/2-inch wrench cannot resolve.
Is a beam torque wrench good enough?
Often better than people assume. A beam wrench has no clutch and no spring held under load, so there is nothing to drift out of adjustment. Its limitation is purely practical: you have to see the pointer, which rules it out for fasteners behind a brake caliper. On budget and honesty it wins; on ergonomics the click wrench wins.
Do I need a digital torque wrench?
Only if you do torque-plus-angle work, and even then there is a cheaper route. A dial-type angle gauge that clips between the ratchet and socket does the same job for a fraction of the price. Digital wrenches still need calibration, still need batteries, and are not meaningfully more accurate for driveway work.
What torque do GM truck lug nuts take?
Full-size GM trucks and SUVs commonly specify 140 lb-ft on M14 x 1.5 studs with a 22 mm socket, but the placard on your driver's door jamb is the authority for your vehicle. Cars and crossovers are lower and vary far more, and aluminium and steel wheels on the same vehicle can carry different specs.
What torque range should my wrench cover?
One that puts your most common spec comfortably mid-scale. Click wrenches are least accurate at the bottom of their range, so avoid the lowest fifth entirely, and avoid working at the absolute top where your body position starts determining the result. A wrench topping out at 150 lb-ft is a poor choice for a 140 lb-ft spec.
How accurate does a torque wrench need to be?
Consumer wrenches are built to ISO 6789 or ASME B107.300, giving roughly ±4% above 10 N·m and about ±6% at or below it. That is far tighter than feel and plenty for any fastener on a consumer GM vehicle. A claimed ±3% is not meaningfully better in a driveway — spend the difference on the right drive size.
How often should a torque wrench be calibrated?
ISO guidance says 5,000 cycles or 12 months, whichever comes first, and tools can drift up to 10% in their first year. For a home mechanic the calendar is the practical trigger. Professional calibration needs a reference device around ±1% in a controlled environment, which is a real cost against an entry-level wrench.
How should I store a click torque wrench?
Dialed down to its lowest setting so the spring is not held compressed, in a hard case rather than loose in a drawer. Do not drop it, do not use it to loosen fasteners, and never put a cheater pipe on it. Any one of those can put a wrench out of spec in a single afternoon.
Can I use an impact gun to torque wheels?
For removal and running fasteners down, yes. For final tightening, no. A mid-range cordless impact can deliver well over 400 lb-ft on burst against a 140 lb-ft target, which is how studs get stretched. Torque sticks are a ceiling rather than a measurement — finish with the wrench.
Does thread lubricant change the torque spec?
Substantially. A lubricated fastener torqued to a dry specification ends up significantly overtightened, because less of your input is lost to friction and more becomes clamp load. Check whether the procedure calls for dry or lubricated threads and follow it — this is a common cause of broken bolts and stripped aluminium.
A Note on Sourcing
Accuracy tolerances and type classifications are those of ISO 6789 and ASME B107.300, the two standards consumer torque wrenches are built and verified to. The calibration interval — 5,000 cycles or 12 months — and the reference-device and environmental requirements are ISO guidance, not a manufacturer recommendation for any particular tool.
The 140 lb-ft lug nut figure is given as a sizing guide for full-size GM trucks and SUVs only, and it is consistent enough across that platform to plan a purchase around. It is not a specification for your vehicle. The placard in your driver's door jamb and your owner's manual govern, and they account for wheel material and model year in ways a general figure cannot.
The torque-plus-angle example — 7.5 lb-ft plus 45 degrees on GM 3.6L V6 water pump bolts — is documented for the 2007–2013 engine and is included to show what an angle spec looks like, not as a procedure for your vehicle.
The buying recommendations, the drive size guidance and the assessment of beam versus digital are our own judgement. We sell tools, and the recommendation here is deliberately that most people need two wrenches rather than the most expensive one.
For more on outfitting a home garage for GM work, browse more shop tool guides.
Still deciding between click, beam and digital?
Short version: click for blind fasteners and repetitive work, beam if you want the most honest reading for the least money and can see the tool, digital only if you need angle. Most GM owners end up with a 1/2-inch click and a 3/8-inch of either type, and that is a genuinely complete setup.
Compare drive sizes, ranges and mechanisms side by side in automotive tools and equipment, and check what other GM owners are buying in best sellers before you decide.