
A flat tire is inconvenient. A flat tire changed unsafely on the shoulder of a highway is dangerous. Here's how to do it right, every time.
Step 1: Get Off the Road Safely
Turn on your hazards immediately and look for the nearest safe, flat spot well away from traffic — a parking lot or wide shoulder, not a curve or hill crest. Set the parking brake and, if you're carrying wheel chocks, place them against the tire diagonal from the flat.
If you cannot get well clear of moving traffic, or the flat is on the traffic side on a narrow shoulder, call for roadside assistance instead. No wheel is worth changing with cars passing a few feet from your shoulder.
Step 2: Loosen the Lug Nuts Before You Jack
With the vehicle still on the ground (where the wheel can't spin), break each lug nut loose about a quarter turn using a lug wrench or your impact socket set. Don't remove them yet — just break the initial torque while the tire's weight is still holding the wheel still.
Torque and lug tools
 ACDelco Tools Torque Wrenches, Digital LCD Display, 1/2 in.
$162.99Tools for breaking lugs loose and torquing them back.
ACDelco Tools Torque Wrenches, Digital LCD Display, 1/2 in.
$162.99Tools for breaking lugs loose and torquing them back.
 ACDelco Tools Torque Wrenches, Digital LCD Display, 3/8 in.
$249.99Tools for breaking lugs loose and torquing them back.
ACDelco Tools Torque Wrenches, Digital LCD Display, 3/8 in.
$249.99Tools for breaking lugs loose and torquing them back.
 APOLLO TOOLS - DT0004-50 Piece ¼” Drive Socket Set
$54.99Tools for breaking lugs loose and torquing them back.
APOLLO TOOLS - DT0004-50 Piece ¼” Drive Socket Set
$54.99Tools for breaking lugs loose and torquing them back.


Step 3: Find the Correct Jack Point
Every GM truck and SUV has reinforced frame jack points behind the front wheels and forward of the rear wheels — check your owner's manual for the exact location. Never jack under the rocker panel plastic or a suspension component that isn't rated to carry the vehicle's weight.
Step 4: Jack Up and Remove the Wheel
Raise the vehicle until the flat tire is a couple inches off the ground. Finish removing the lug nuts, set them somewhere they won't roll away, and pull the wheel straight off the hub.
Never put any part of your body under a vehicle held up by a jack alone. Changing a wheel does not require you to go underneath, and a roadside flat is not the moment to make an exception. If the job turns into something that needs you under the truck, it needs jack stands and a level surface — not a shoulder.
Jack and inflator
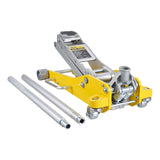 SucceBuy 3T/2T Floor Jack Aluminum Hydraulic Racing Jack
$145.36A real jack and a portable inflator beat the factory kit.
SucceBuy 3T/2T Floor Jack Aluminum Hydraulic Racing Jack
$145.36A real jack and a portable inflator beat the factory kit.
 DTI-13G Digital Tire Inflator
$85.99A real jack and a portable inflator beat the factory kit.
DTI-13G Digital Tire Inflator
$85.99A real jack and a portable inflator beat the factory kit.
 Car Tire Inflator Pump Portable Car Air Compressor Corded
$64.99A real jack and a portable inflator beat the factory kit.
Car Tire Inflator Pump Portable Car Air Compressor Corded
$64.99A real jack and a portable inflator beat the factory kit.
 Tire Inflator 12V DC 100W 150PSI Digital Tire Pump w/LCD
$60.99A real jack and a portable inflator beat the factory kit.
Tire Inflator 12V DC 100W 150PSI Digital Tire Pump w/LCD
$60.99A real jack and a portable inflator beat the factory kit.


Step 5: Mount the Spare or Replacement Wheel
Line up the wheel on the hub, thread each lug nut on by hand first to avoid cross-threading, and snug them in a star pattern — never in a circle, which pulls the wheel on unevenly.
Step 6: Lower and Torque Properly
Lower the vehicle back to the ground before doing your final tightening — this lets the wheel's own weight resist the torque instead of the jack. Tighten each lug nut the rest of the way in the same star pattern, then go around once more to confirm every nut is fully seated.
Use the torque figure for your specific vehicle, not a general one. Wheel nut torque varies by model, model year, wheel material and fastener type on GM vehicles, and the numbers circulating online frequently contradict each other. Your figure is in the Capacities and Specifications section of your owner's manual — and if you run aftermarket wheels, the wheel manufacturer's spec overrides the vehicle's. Overtightening stretches studs and distorts the rotor hat; undertightening lets a wheel come loose.
Step 7: Re-Torque After 50–100 Miles
New or reinstalled wheels can seat slightly after driving, which loosens torque even on a correct install. Re-check lug nut torque within the first 50–100 miles — and if you tightened by feel at the roadside because you had no torque wrench with you, treat that re-check as mandatory rather than optional.
Two Things Worth Knowing About Compact Spares
If your truck carries a compact or temporary spare, it has its own speed and distance limits printed on the tire sidewall, and it is not a substitute for a full-size tire. Drive to a tire shop, not on with it indefinitely.
Also check your spare's pressure occasionally. A spare that has been under the truck for six years is frequently flat when you finally need it, which is the worst possible moment to find out.
What You Need to Do This Right
The scissor jack and wrench that came with the truck will change a wheel at the roadside. The items below are for doing the job properly at home, where you have level ground and time:


Roadside and tire gear
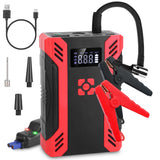 Car Jump Starter with Air Compressor Portable Car Battery
$177.99Roadside gear worth keeping in the vehicle.
Car Jump Starter with Air Compressor Portable Car Battery
$177.99Roadside gear worth keeping in the vehicle.
 47Pcs Emergency Survival Kit Survival EDC Gear Equipment Tool
$78.99Roadside gear worth keeping in the vehicle.
47Pcs Emergency Survival Kit Survival EDC Gear Equipment Tool
$78.99Roadside gear worth keeping in the vehicle.
 ACDelco TPMS Valve Stem Sensor
$86.99A TPMS sensor can break during a roadside tire change. Confirm fitment by VIN before ordering.
ACDelco TPMS Valve Stem Sensor
$86.99A TPMS sensor can break during a roadside tire change. Confirm fitment by VIN before ordering.
 ACDelco TPMS Valve Stem Sensor
$82.99A TPMS sensor can break during a roadside tire change. Confirm fitment by VIN before ordering.
ACDelco TPMS Valve Stem Sensor
$82.99A TPMS sensor can break during a roadside tire change. Confirm fitment by VIN before ordering.


Bottom Line
A flat tire only turns into a bigger problem when it's handled in a rush. Get well clear of traffic, use the correct jack points, never go under a jacked vehicle, torque in a star pattern to your vehicle's own specification, and re-check after a short drive. Our guide to GM lug nut sizes and torque specs covers where to find your figure and which socket actually fits, and the jack and jack stand capacity guide covers doing it properly at home.