
P0641 is Sensor Reference Voltage "A" Circuit/Open and P0651 is the same fault on the "B" circuit — known on GM as 5 Volt Reference 1 and 5 Volt Reference 2. These are among the most valuable codes to understand properly, because they explain something that otherwise looks impossible: a scan tool full of codes for sensors that are all perfectly good. When a shared reference circuit fails, every sensor on it starts reporting nonsense at once. The fix is usually one component or one wire — not the six things the scan tool named.
Jump to a section: What these codes mean · How GM splits the reference circuits · One fault, many codes · The test that finds it · Why you may have misfire codes · The other reference codes · Do not replace the module first · A note on sourcing · Symptoms · Causes and how to confirm each · How they're diagnosed · Parts and cost · What other pages get wrong · FAQ
What Do P0641 and P0651 Mean?
Most engine sensors cannot generate their own signal from nothing. The module supplies them with a precise 5-volt reference, and the sensor returns a portion of that voltage back — which is how the module reads position, pressure or angle.
Three-wire sensors typically use this arrangement: a 5-volt reference, a low reference (ground), and a signal wire. Throttle position, pedal position, MAP, fuel rail pressure, oil pressure and camshaft position sensors all work this way.
P0641 and P0651 set when the module sees voltage on one of those reference circuits that is outside specification — too high, too low, or missing entirely. The expected value sits close to a steady 5 volts.
The critical structural fact: these circuits are shared. One internal reference inside the module feeds several external sensors. That single design decision is what makes these codes behave the way they do — and what makes them so often misdiagnosed.
How GM Splits the Reference Circuits
A GM engine control module typically contains four internal 5-volt reference circuits, though some applications have two. Each one supplies more than one sensor.
Here is an example of how those groupings can look on a GM application. Treat this as an illustration of the principle, not as a map of your vehicle — which sensors sit on which rail varies considerably by engine and model year.
| Reference circuit | Sensors it may feed | Code it sets |
|---|---|---|
| Rail 1 | Engine oil pressure, fuel rail pressure, A/C refrigerant pressure, exhaust pressure differential, camshaft position | P0641 |
| Rail 2 | Accelerator pedal position 2, MAP, brake pedal position | P0651 |
| Rail 3 | Accelerator pedal position 1, intake air valve position | P0697 |
| Rail 4 | EGR position | P06A3 |
| Rail 5 | Crankshaft position, cooling fan speed, DEF pressure, turbocharger vane position | P06D2 |
Look at what sits together on Rail 1 in that example. Oil pressure, fuel pressure, and camshaft position have nothing to do with one another mechanically — but electrically they share a lifeline. Take that lifeline down and all three start lying simultaneously.
Note also which sensors are absent. Two-wire temperature sensors — coolant, transmission fluid, intake air — use a dedicated feed rather than a shared reference, so they generally stay honest when a rail goes down. That asymmetry is useful diagnostic information in itself.
The practical takeaway: get the wiring diagram for your specific vehicle. Knowing which sensors share the affected rail turns this from a guessing exercise into a short list.
Tools for testing the 5-volt reference
 FOXWELL NT614 Elite Scanner
$233.69Watch sensor voltages drop out in live data as you unplug sensors.
FOXWELL NT614 Elite Scanner
$233.69Watch sensor voltages drop out in live data as you unplug sensors.
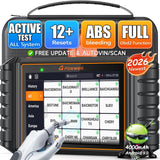 FOXWELL NT726 Bidirectional Scanner
$368.99Bidirectional scanner with full engine data.
FOXWELL NT726 Bidirectional Scanner
$368.99Bidirectional scanner with full engine data.
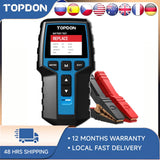 TOPDON BT200 Battery Tester
$103.99Battery tester — rule out low system voltage.
TOPDON BT200 Battery Tester
$103.99Battery tester — rule out low system voltage.

One Fault, Many Codes
This is the insight that makes the whole page worth reading.
When a reference circuit fails, every sensor sharing it reports implausible values at once. The module dutifully sets a code for each. So you plug in a scan tool and find a screen full of faults across systems that have no mechanical relationship.
The natural reaction is to assume something catastrophic has happened. The correct reaction is the opposite: a pile of unrelated sensor codes appearing together is strong evidence of a single shared-circuit fault, not many simultaneous failures.
How to read the companions:
- A fuel rail pressure code alongside P0641 — suspect the shared reference, not the pressure sensor. Our P0191 guide covers that sensor on its own merits.
- A camshaft position code alongside P0641 — same reasoning. Our P0340 and P0341 guide covers the sensor itself.
- A MAP code alongside P0651 — the reference is the stronger suspect. See our P0106 guide and our P1106 guide, both of which flag the shared reference as a cause.
- Pedal position codes alongside either — our P1271 guide and P2135 guide cover correlation faults that a reference problem can produce.
The rule worth carrying: when several sensor codes appear together, look for what they share before you look at any of them individually. That principle runs through our U0100 guide and our P1403 guide as well — shared power, shared ground, shared reference.
The Test That Finds It
Straightforward, effective, and it needs nothing more than a multimeter and patience.
The most common cause of these codes is a single sensor that has failed internally and is pulling the shared reference down. A sensor with an internal short does not politely fail on its own — it drags the whole rail with it, taking every other sensor on that circuit with it.
Which means the sensor at fault is often not one that set a code at all. It is simply the one that shorted.
The isolation procedure:
- Get the wiring diagram and list every sensor on the affected reference circuit.
- Measure the reference voltage at a sensor connector with the ignition on. You are looking for a steady 5 volts.
- Unplug one sensor on that rail.
- Re-measure. If the reference is still wrong, plug it back in and move to the next.
- When the voltage returns to a steady 5 volts, the sensor you just unplugged is the one dragging the circuit down.
That is the whole technique, and it is decisive. It converts an intimidating screen full of codes into one identified component.
If unplugging every sensor never restores the reference, the fault is in the wiring or the module rather than a sensor — which is where the next steps go.
Before any of that, do the free checks. Test the battery and charging system, and check grounds with voltage drop under load rather than a static resistance reading. A module cannot produce a stable reference from an unstable supply.
Why You May Have Misfire Codes
A connection worth understanding, because it prevents a genuinely expensive detour.
Misfire codes can be a symptom of a reference circuit fault rather than a separate problem. The module calculates ignition timing and fuel delivery from sensor inputs — and if MAP or camshaft position data is corrupted by a bad reference, the module commands the wrong timing and the wrong fuelling. The engine then genuinely does misfire.
So the misfire is real, but its cause is electrical rather than mechanical.
The trap is obvious once stated: chasing plugs, coils and injectors on a vehicle whose module is working from corrupted data. Fix the reference circuit first, clear everything, then see which codes actually return.
Our P0300 guide covers genuine misfire diagnosis for once you have trustworthy inputs — and the same "fix the data source first" logic appears in our P1380 and P1381 guide.
The Other Reference Codes
P0641 and P0651 have siblings, and they work identically — only the rail differs.
- P0697 — a third reference circuit
- P06A3 — another, which on some applications feeds the EGR position sensor. Our P046C guide covers that sensor, and a reference fault is worth ruling out before condemning it
- P06D2 — another again
Everything on this page applies to those too. Identify which sensors share the rail, check supply and grounds, then unplug sensors one at a time until the reference recovers.
And note the family they belong to. Codes in the P06xx range concern the control module and its own circuits rather than the systems it manages. That is a useful thing to recognise on sight.
Do Not Replace the Module First
Worth its own section, because this is where the serious money gets wasted.
The reference circuits originate inside the module, so a module fault can genuinely cause these codes. But it is nowhere near the most likely cause, and it is by far the most expensive conclusion.
Everything below should be excluded first:
- A shorted sensor pulling the rail down — the leading cause, and found by the unplugging test
- Chafed or damaged wiring. One documented case traced a stubborn reference fault to a chafed wire near the firewall causing an intermittent open — with every sensor on the circuit perfectly healthy
- Corroded or backed-out connector terminals, which need a pin drag test rather than a visual check
- A reference wire shorted to ground or to voltage elsewhere in the harness
- Poor module grounds or marginal supply voltage
Do a wiggle test. Flex the harness while watching the reference voltage live — intermittent faults reveal themselves this way and will never be caught by a static measurement.
If a shop proposes a module, ask what circuit testing was performed and whether the sensors on the rail were isolated individually. That is a fair question, and on this code it is the right one.
A Note on Sourcing for These Codes
We cite documents we have read and label the rest.
We could not verify a GM service bulletin naming P0641 or P0651 on a specific GM platform. The definitions are standardised — these are generic OBD-II codes rather than GM-specific ones — and GM's own naming as 5 Volt Reference 1 and 2 is consistent across independent references.
The point that a GM module contains four internal 5-volt reference circuits, each feeding more than one sensor, is corroborated rather than verified by us. The rail groupings in the table above come from a published example for one GM application and are included to show how the sharing works — not as a map of your vehicle. Confirm against your own wiring diagram.
The isolation procedure and the misfire connection reflect well-established practice rather than a GM document we opened.
Which sensors share which rail is the single most useful thing to establish, and it is vehicle-specific. A dealer can confirm it against your VIN.
Symptoms of P0641 and P0651
- Check engine light on
- Multiple sensor codes stored at once, across unrelated systems — the signature symptom
- Reduced Engine Power or limp mode
- Rough running, hesitation or stalling
- Misfire codes that are real but electrically caused
- Poor fuel economy
- Erratic or implausible live data from several sensors
- Hard starting, or a no-start in severe cases
- Shifting problems, where transmission control depends on affected inputs
On urgency: moderate to high. The module is making fuelling and timing decisions from corrupted data, and limp mode can arrive without warning. The safety consideration is the same as on our throttle pages — losing power while merging or overtaking is genuinely hazardous, so avoid highway driving and towing until it is resolved. The engine is not being destroyed, but it is not running on good information either.
Causes and How to Confirm Each
| Cause | How to confirm it | Notes |
|---|---|---|
| A sensor shorted internally, pulling the rail down | Unplug sensors on that rail one at a time until the reference returns to 5V | The leading cause. The culprit may not have set a code itself |
| Chafed or damaged reference wiring | Inspect the harness; wiggle test while watching live voltage | Documented as causing stubborn intermittent faults |
| Corroded or backed-out terminal | Pin drag test rather than visual inspection | A backed-out terminal looks perfectly seated |
| Reference shorted to ground or voltage | Circuit testing against the wiring diagram | Explains a rail that never recovers when sensors are unplugged |
| Poor module ground | Voltage drop testing under load, not static resistance | Free to check. A stable reference needs a stable ground |
| Weak battery or charging fault | Test under load, and check for ripple | Free to check; unstable supply, unstable reference |
| Water intrusion in a connector | Inspect for moisture and corrosion | Common after washing or wading |
| Damage from recent work | Ask what was done near the harness | A code following work usually relates to it |
| Poor-quality replacement sensor | Establish what was fitted if a sensor was recently replaced | A faulty new sensor can short the rail as readily as an old one |
| Module fault | Last, after sensors, wiring, connectors, grounds and supply | The expensive conclusion. Ask what was tested first |
Sensors on the 5-volt circuit
 Delphi PS10000 MAP Sensor (2000–2011)
$94.99Delphi MAP sensor — a shorted sensor pulls down the reference. Confirm fitment by VIN before ordering.
Delphi PS10000 MAP Sensor (2000–2011)
$94.99Delphi MAP sensor — a shorted sensor pulls down the reference. Confirm fitment by VIN before ordering.
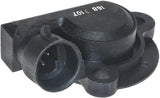 ACDelco Gold 19322821 Throttle Position Sensor
$58.77ACDelco Gold throttle position sensor. Confirm fitment by VIN before ordering.
ACDelco Gold 19322821 Throttle Position Sensor
$58.77ACDelco Gold throttle position sensor. Confirm fitment by VIN before ordering.
 ACDelco Accelerator Pedal 25832864
$141.99ACDelco accelerator pedal position sensor. Confirm fitment by VIN before ordering.
ACDelco Accelerator Pedal 25832864
$141.99ACDelco accelerator pedal position sensor. Confirm fitment by VIN before ordering.
 ACDelco Remanufactured ECM
$301.99ACDelco remanufactured engine control module. Confirm fitment by VIN before ordering.
ACDelco Remanufactured ECM
$301.99ACDelco remanufactured engine control module. Confirm fitment by VIN before ordering.


How Are P0641 and P0651 Diagnosed?
- Record every stored code before clearing anything. The companions tell you which rail is affected and are the main evidence.
- Resist treating the companion codes as separate faults. Several unrelated sensor codes together point at what they share.
- Test the battery and charging system under load. Free.
- Check module grounds with voltage drop under load. Free, and a stable reference depends on them.
- Get the wiring diagram and list every sensor on the affected reference circuit.
- Measure the reference voltage at a connector on that rail, ignition on. Expect a steady 5 volts.
- Unplug sensors one at a time, re-measuring after each, until the reference recovers.
- Wiggle test the harness while watching live voltage, to catch intermittent faults.
- Inspect connectors for corrosion, moisture and terminal grip.
- Repair the fault and reroute any damaged wiring clear of what caused it.
- Clear all codes and drive it, then see which codes genuinely return.
Parts and Cost
| Repair | What it involves | Cost picture |
|---|---|---|
| Ground repair | Where voltage drop testing finds a poor ground | Among the cheapest outcomes. Check first |
| Connector or terminal repair | Corrosion, moisture, or a backed-out terminal | Modest — and a common answer |
| Wiring repair and reroute | Where chafing or a short is found | Modest. Rerouting stops it recurring |
| One shorted sensor | Identified by the unplugging test | Moderate — and it resolves every code on the rail at once |
| Battery or charging repair | Where testing shows it is marginal | Moderate |
| Diagnostic time | Wiring diagram, isolation testing, wiggle testing | Worth paying for. It is what prevents the row below |
| Replacing every sensor that set a code | What happens when the shared circuit is not recognised | Several parts bought to fix one fault |
| Control module | Only after everything upstream is excluded; needs programming | The most expensive conclusion by far |
The two bottom rows are the whole reason to read this page. Confirm any part against your VIN.
Wiring parts
 ACDelco 2-Pin Replacement Connector PT3739
$90.99Two-pin replacement connector for a shorted sensor connector. Confirm fitment by VIN before ordering.
ACDelco 2-Pin Replacement Connector PT3739
$90.99Two-pin replacement connector for a shorted sensor connector. Confirm fitment by VIN before ordering.
 Nomex Split Loom, 1 in. x 10 ft
$105.66Split loom to protect a repaired harness.
Nomex Split Loom, 1 in. x 10 ft
$105.66Split loom to protect a repaired harness.


What Other P0641 / P0651 Pages Get Wrong
- Treating the companion codes as separate faults. This is the central error. Several unrelated sensor codes appearing together is evidence of one shared-circuit problem, not many simultaneous failures — and replacing each named sensor is how people spend several hundred dollars fixing nothing.
- Not explaining that the circuits are shared. A GM module has multiple internal 5-volt references, each feeding several sensors. Without that fact the codes make no sense and the diagnosis has no shape.
- Omitting the isolation test. Unplugging sensors one at a time until the reference returns to 5 volts is decisive, needs only a multimeter, and identifies the culprit directly.
- Missing that the faulty sensor may not have set a code. The sensor dragging the rail down is often not among the ones reporting problems — it is simply the one that shorted.
- Going to the module early. The reference originates there, so it is a plausible cause and the most costly one. Sensors, wiring, connectors, grounds and supply all come first.
- Not connecting it to misfires. Corrupted MAP or camshaft data makes the module command wrong timing and fuelling, so the misfire is real but electrically caused. Chasing plugs and coils there is wasted work.
- Skipping the wiggle test. Intermittent reference faults are common and invisible to a static measurement.
Frequently Asked Questions
My scan tool shows six codes. Is my engine falling apart?
Almost certainly not, and the number of codes is actually reassuring here. Several sensors share each 5-volt reference circuit, so when that circuit fails they all start reporting implausible values simultaneously and the module sets a code for each. A screen full of unrelated sensor codes is strong evidence of one shared-circuit fault rather than many failures.
How do I find which sensor is at fault?
Get the wiring diagram, list every sensor on the affected reference circuit, then measure the reference voltage at a connector with the ignition on. Unplug one sensor at a time, re-measuring after each. When the voltage returns to a steady 5 volts, the sensor you just unplugged is the one pulling the circuit down.
The sensor I found wasn't one that set a code.
That is normal and expected. A sensor with an internal short drags the whole rail down, which makes every other sensor on that circuit report nonsense — but the shorted one may not itself produce an implausible reading. It is the cause rather than a casualty, which is exactly why the isolation test matters more than the code list.
What's the difference between P0641 and P0651?
Only which circuit is affected. P0641 is reference circuit "A" — GM's 5 Volt Reference 1 — and P0651 is circuit "B," reference 2. The diagnosis is identical; you simply work on a different set of sensors, which you identify from the wiring diagram for your vehicle.
Do I need a new ECM?
Very probably not, and it should be the last conclusion rather than the first. The reference circuits do originate inside the module, but a shorted sensor or damaged wiring is far more common. Before anyone quotes a module, ask whether the sensors on the rail were isolated one at a time, whether a wiggle test was performed, and whether grounds were checked with voltage drop under load.
I have misfire codes too. Do I need plugs and coils?
Fix the reference circuit first, then find out. The module calculates timing and fuelling from sensor inputs, so corrupted MAP or camshaft data makes it command the wrong values — and the engine genuinely misfires as a result. The misfire is real, but its cause is electrical. Clear everything after the repair and see what actually returns.
Why do my coolant temperature readings look fine?
Because two-wire temperature sensors generally use a dedicated feed rather than a shared 5-volt reference. Coolant, transmission fluid and intake air temperature sensors tend to stay honest when a reference rail goes down, while the three-wire pressure and position sensors on that rail all go wrong at once. That contrast is a useful clue.
Can I keep driving?
Get it seen to promptly. The engine is not being destroyed, but the module is making decisions from corrupted data and limp mode can arrive without warning. Losing power while merging or overtaking is a real hazard, so avoid highway driving and towing until it is repaired.
Shop Related Parts & Tools
Identify the one fault before buying anything — on these codes the scan tool names several sensors and usually only one thing is wrong.
-
 MOTOPOWER MP69033 OBD2 Scanner — the full code list is the diagnosis on these. Which sensors reported faults together is what identifies the affected reference circuit, so record everything before clearing.
-
 VDIAGTOOL BT500 Battery Tester — a module cannot produce a stable 5-volt reference from an unstable supply. Testing under load with ripple analysis rules that out before you start unplugging sensors.
-
 95-Piece Mechanics Tool Set (Metric & SAE) — for reaching the sensor connectors you will be unplugging one at a time, some of which sit in awkward places.
Related Guides
- P1106 Code: MAP Sensor Circuit Intermittent High Voltage — a sensor code the shared reference can cause
- P0300 Code: Random/Multiple Cylinder Misfire Detected — for once the inputs are trustworthy
- U0100 Code: Lost Communication With ECM/PCM — the same "look at what they share" principle
- P046C Code: EGR Position Sensor Performance — a sensor with its own reference code sibling